
 Michele says:
Now that we’ve completed our first sewing project, it’s almost time to move on to the next big step in sewing: the sewing machine. Before we do, though, we’re going to get back to the most basic of basics and learn how to reattach a button in under five minutes. But what do you do if you can’t find the buttons that came in the little plastic baggie attached to the cuff or collar of your shirt? Throw the shirt out, of course. (Just kidding!)

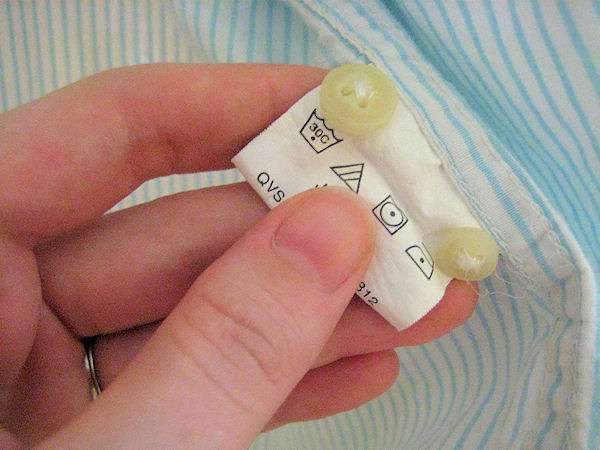
Before you cry over lost buttons, look inside the shirt’s body to find the care tag. Fortunately, many clothing manufacturers have wised up and have started sewing their extra buttons to the tag which helps you find them when you need them, instead of when you’re cleaning out the random buttons that accumulate in your junk drawer and/or your sewing basket.
Still no spare button to be found? If you don’t plan to use the shirt as a hand-me-down, check the sleeves’ cuffs. Many shirts have two buttons that allow you to adjust the size of the cuffs, but those spare buttons are pointless to keep around once you’ve adjusted the cuffs for your wrist size. As an added bonus, your shirt looks more tailored without an adjustable button cuff, so that’s a win-win situation in my book!

If neither of the above options works for you, head on over to your local fabric- or craft store (if it’s a craft store, make sure it’s one that sells sewing notions) with your shirt in hand. Locate the section of sewing notions (needles, Velcro, and buttons, oh my!) and find the buttons that best match your shirt’s original buttons. To be honest, the button don’t have to match perfectly, they just have to match well enough to pass at a glance. If the button is missing from your shirt’s placket rather than the sleeve, simply swap the mismatched placket button for one from the shirt’s cuff. (The not-quite-matching button will be much less noticeable on your sleeves.)
Whew! Now that those pesky button-related details are out of the way, let’s get to the easy part and mend our presently buttonless shirts, shall we?
How to Reattach a Lost Button

What You’ll Need:
- Matching button
- Matching all purpose thread
- Thin, sharp needle
- Seam ripper (optional)
Notes: Whatever you do, don’t wash your shirt after the button falls off! The old thread will leave guide holes that show you where to position the button. If you accidentally washed the shirt and can’t find preexisting holes, simply line up shirt as though you intend to button it. Use a pencil or colored chalk to mark a little dot inside the buttonhole. The little dot will show you where to place your button so that it, well, buttons.
Step 1: If the button is attached to the tag (or if you’re using an “extra” button from the cuff), use your seam ripper to cut the button loose. Thread your needle.

Step 2: Insert your needle from back to front through one of the “guide holes”. Alternatively, center your button on the mark you made (see “Notes” above) and hold it tight as you insert the needle from back to front, guiding the needle through one of the holes in the button.

Step 3: Place the button on the needle and pull the needle and thread through one of the button’s holes.

Step 4: Insert the needle in the hole diagonal from the hole you started with. (If using a two-holed button, just insert the needle into the second hole.)

Step 5: On the wrong side, insert the needle into the nearest unused/empty button hole.

Step 6: Insert the needle through the final remaining empty hole to make an “x” out of your thread. (At this point, you can do a quick test: carefully button your shirt to make sure the button and the buttonhole still line up.)

Step 7: Repeat steps 2-6 two more times to reinforce the button. Tie off and trim the remaining thread.

Congratulations, your shirt is now as good as new! While your sewing basket is out, may I suggest you take a few minutes to reinforce the other buttons?

Michele Newell is a housewife turned blogger turned Home Ec 101 contributor. You can read her near daily ramblings at Dreams Unreal.

In all of my years of reattaching buttons, you have taught me a step that would have saved me lots of frustration! I would have never thought of “pilot holes!” I want to go sew a button just to use the trick. Thanks so much for teaching us older, or not so much older dogs new tricks.
I apologize for taking a few days to respond, but I’m so glad to have taught you a nifty new trick! I nearly drove myself crazy reattaching buttons before I figured that out. 😉
I have an additional ‘trick’ to share. I start and end the thread on the front side of the fabric (i.e. under the button)
1 – Thread needle and knot the end.
2 – Insert needle into the front side of the fabric.
3 – Pull needle up so your button will go onto the needle now.
4 – Loosely sew up and down through button holes about 4-6 times with a doubled thread or 2-3 times with a quadrupled thread. Use a toothpick under the button to ensure ‘loosely’ especially if the fabric is thick.
5 – End with the thread and needle on the BUTTON side close to the button stitches you made.
6 – Wrap the thread around the underside of the button 3 times (this creates a thread shank so there is space for the layers of fabric.)
7 – Slip the needle under the thread shank.
8 – Insert needle into the loop of the thread twice to make a knot.
9 – Tug firmly to ensure knot is snug.
The benefits of this method are:
a – there is no bothersome knot rubbing on the skin of the wearer
b – there is space for the buttonhole side of the fabric to lay flat when buttoned so there is no weird tight bunching look of the garment
c – the look of your button is more professional
This is something I do with winter coats, but I had never thought to use this technique with shirts. Thanks for sharing!
“Use a pencil or colored chalk to mark a little dot inside the buttonhole.” It is amazing that after many years of sewing, I’ve never known this hint! I am getting ready to give it a shot. My dear husband not only pulled the button off, but ripped the fabric from behind it. I’ve iron-on a fusable patch and sewed it in for extra security to give the site a little more strength and will now sew the button on, slightly off, but I will use the pencil to mark where my button’s holes should line up!
Thank you for all of the great tips!
Don’t feel badly about not knowing that little tip. While I’m sure there are some folks out there who were taught to do this, I had to figure it out on my own when a button fell off my AFJROTC uniform shirt (I was in charge of uniform inspections which meant the Major inspected my uniform; no room for a slightly misplaced button with his eagle eyes). 😉
Good luck with your repair and thanks for the feedback! It’s always so nice to hear that a post has taught someone a new tip or way of doing something.
Another method to avoid at least one knot under the fabric is to use double the amount of thread you’ll think you’ll need for one button, then thread BOTH ends through the eye of the needle. This gives you two short lengths of excess beyond the needle eye, and a continuous loop of thread on the other end (where your first knot would normally be).
With the top side of the fabric facing you, insert just the tip of your needle about 1/8 – 1/4″ from where the center of the button will be, then bring the tip back up where the center of the button will sit. Pull the thread up through the fabric until the loop of thread is close, then thread your needle through that loop to lock it down on top of the fabric. Now you’re ready to sew on the button, and you’ll finish with just one knot to be made. 🙂