
Bran says:
I thought I hated brussels sprouts.
I think a lot of us have felt that way.
After all, to many people, the boiled things that get served up to us as children, sodden and vaguely buttered, are not exactly the most appetizing of vegetables. But brussels sprouts can be a great winter green, a nice seasonal change from kale or cabbage.
When my genius-of-a-gluten-free-baker and star-of-a-cook friend Brooke pointed to the stove several years ago and said, “Brussels sprouts, eat them,” I shot a terrified look at my friend Mary next to me. She nodded as if to say, “No, really. Eat them.” So I reluctantly did, and the reluctance fell away with the first bite. But, man, were they not the same vegetable I remembered from my childhood. They were soft and crisp and salty and vaguely sweet and fantastic.
I remembered those sprouts years later when I had to pick a dish for Thanksgiving. I surfed the web, read about ten recipes for oven-roasted brussels sprouts, and made up my own on the fly. Then, I pulled them out of the oven, and my friends crowded around the tray, staring, saying with surprise, “Those look… good.”
They didn’t survive until dinner. They barely even survived until they were cool. In hindsight, I really should have made more. After all, these things are little caramelized beauties covered in olive oil, salt, and garlic.
They’re effortless to make.

Oven-Roasted Brussels Sprouts
- 1 lb fresh brussels sprouts
- > 1Tb vegetable oil (olive, sunflower, almost whatever suits you)
- ≥ 1 tsp kosher salt
- 2 cloves of garlic, or to taste
Preheat your oven to 350 degrees F.

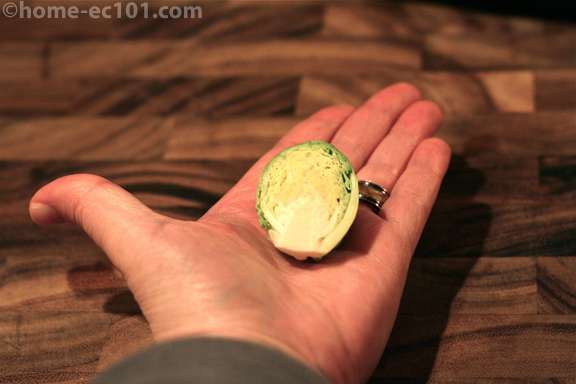
When choosing sprouts for this dish, try to find relatively small ones and preferably a nice dark or medium green. If they look pale and yellow in the store or big (1.5″ or bigger), your results aren’t going to be as spectacular, and they might take a bit more work, but they’re still useable.
How to Prepare Brussels Sprouts for Cooking
Take off the first couple of layers of leaves from the sprouts. There are three reasons for this: They come from the ground (amazing!) before they get to the shop, so they’re bound to be a bit dirty, and stripping the outer layer will help ease the cleaning. Also, I often find that the outermost leaves are a bit limp from the cold and damp of the vegetable section, so getting rid of them first off helps with that. Thirdly, the best part about this dish is the juxtaposition of the soft, almost artichoke-like inside and the crispy leaves outside, so if there are too many leaves outside, the balance is less awesome than it could be.
The easiest thing to do to start the defoliation is to cut about 1/4 to 1/2 inch off from the end of the stem, depending on whether the sprout is small or large. That will let you peel off the first layer, at least more easily. Then, take a look at the sprout, and if you see spots or soil or insect holes, peel those leaves off. When you’re finished, you should have a paler-green, clean-looking sprout. Set it aside and repeat that with all the rest of them.
I still like to wash the sprouts after they’ve been stripped down a bit, but your mileage may vary depending on how picky you were when you defoliated them. I run warm water over them and leave ’em to drain in a colander for a few minutes.

Next, take a sturdy knife and cut them in half longitudinally. You want to get them to be vaguely the same mass, so if your container of sprouts has a mix of small ones and big ones, cut those larger ones into quarters. This way, they’ll all cook more evenly.
After that, you have garlic-based decisions to make. I like my garlic softer, so I peel and cut my cloves into large chunks, perhaps into quarters or eighths. This means not every bite of sprout will have garlic, but the garlic I have is somewhere between soft and chewy. However, I know some people like their garlic to get everywhere, so if you’re one of those people, mince your garlic finely. Bear in mind, however, that if you do that, you won’t be able to roast the sprouts for as long before the garlic burns, so your result won’t be as caramelized. Don’t like garlic? Leave it out! It’s entirely up to you.
(Edited to add: The easiest way not to worry so much about over-cooking the garlic is to add it in after the sprouts have been cooking for 10-15 minutes. Then, you won’t have to worry so much about the garlic getting too crunchy. Just make sure that it’s well-coated in oil.)

Toss the sprouts and the garlic into a medium-large bowl, and pour your oil and salt over them. I personally like a mix of about half sunflower oil and half olive oil, an overflowing, sloppy, half-tablespoon of each. Still, as far as I have noticed, combinations of olive, sunflower, safflower, and soybean oils have all worked out fine. And please use kosher salt or some other large-grind salt; any small particles of salt crystal that remain after most of it dissolve in the cooking process will contribute to the finished texture.
Mix that mess up with a spoon or your clean hand, making sure every sprout and all your garlic is covered in salt and oil. (Mmm. Salt and oil.)
Cover a baking sheet or roasting pan in either parchment paper or aluminum foil (it makes a negligible difference in the cooking process, but my preference is the aluminum foil). Spread the sprouts out over it, cut side down, and leave a bit of space between them. Roast the sprouts in the oven until the tops caramelize to a dark brown. (Or, if you’re like me, even darker.) This takes me somewhere around 45 minutes, but you’ll be able to tell when they’re done. They’re not done if the tops haven’t turned a chocolate-colored brown yet. If they’re black, take ’em the heck out. Take ’em out if it stops smelling good and starts to smell like garlic burning. You’ve got a fair amount of leeway here, and they’re pretty forgiving.
They lose heat pretty fast, so it’s a good thing they’re good at room temp. If you can wait that long. I can’t; the last photo is missing four or so that I scarfed as I put them in the bowl and set up the picture. Oops.
This recipe serves, well…maybe two adults? Something like that. I usually eat them by myself as a snack. (They’re like potato chips! But green!) They can be refrigerated; although they lose their crispiness, they still taste great. I’ve also quadrupled the recipe with no issues, so feel free to make extra. But, most of all, enjoy!
Bran needs a bio. Bran can be found making amazing things at Mydwynter Studios.

I had my first experience with roasted Brussels sprouts last month. I've always loved them, but now I love them MORE. Plus? My kids loved them!
This is happening in my house. This week. Dear wife; YOU'RE GONNA EAT THESE. Love, the guy that does the cooking and the shopping so you'll eat what he gives you. 😉
it's true! this is the best way to eat brussel sprouts. 🙂
I have always loved brussel sprouts. I will definately try this recipie! It sounds delicious!!
I have converted many an avowed brussels sprouts hater by roasting the sprouts. People only THINK they hate sprouts. I've also blanched and then sauteed with pancetta or bacon. You still get the crispy brown outside but now it's covered in bacon fat. Nom, nom, nom.
i adore brussel sprouts, and these look divine!!!
I love brussels sprouts roasted this way – the saltier the better. They are also good tossed around with a little bit of chopped bacon or pancetta.
These were so delish! I’m 38yrs old and have never had a brussel sprout in my life until last night. This was the recipe I used, and I added in some chopped bacon on my own. WOW! My 13yr old step-daughter and I devoured an entire bushel! Thank you for introducing me to my new favorite veggie!